Vue3+TS(uniapp)手撸一个聊天页面
前言
最近在自己的小程序中做了一个智能客服,API使用的是云厂商的API,然后聊天页面...嗯,找了一下关于UniApp(vite/ts)版本的好像不多,有一个官方的但其中的其他代码太多了,去看懂再删除那些对我无用的代码不如自己手撸一个,先看效果:
好,下面开始介绍如何一步一步实现
重难点调研
1. 如何编写气泡

可以发现一般的气泡是有个“小箭头”,一般是指向用户的头像,所以这里我们的初步思路就是通过before与after伪类来放置这个小三角形,这个小三角形通过隐藏border的其余三边来实现。

然后其中一个细节就是聊天气泡的最大宽度不超过对方的头像,超过就换行。这个简单,设置一个max-width: cacl(100vw - XX)就可以了
2. 如何编写输入框
考虑到用户可能输入多行文字,这里使用的是<textarea>标签,点开微信发个消息试试,发现它是自适应的,这里去调研了解了一下,发现小程序自带组件有这个实现,好,那直接用:

然后我们继续注意到发送按钮与输入框的底线保持水平,这个flex里有对应属性可以实现,跳过...
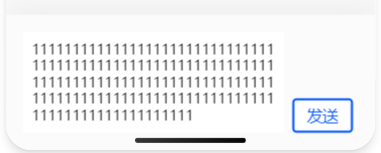
3.如何实现滚动条始终居于底部
当聊天消息较多时,我们发现我们继续输入消息,页面并没有更新(滚动)。打开微信聊天框一看,当消息过多时,你发一条消息,页面就自动滚动到了最新的消息,这又是怎实现的呢?
继续调研,发现小程序自带的<scroll-view>标签中有个属性scroll-into-view可以自动跳转:
<scroll-view scroll-y="true" :scroll-into-view="`msg${messages.length-1}`" :scroll-with-animation="true">
	<view class="msg-list" :id="`msg${index}`" v-for="(msg, index) in messages" :key="msg.time">
		<view class="msg-item">
		略
		</view>
	</view>
</scroll-view>
概述
简单分析下来好像一点都不难,如下是我的文件列表,话不多说,开始撸代码!
chat
├─ chat.vue
├─ leftBubble.vue
└─ rightBubble.vue
左气泡模块
左气泡模块就是刚刚分析的那一部分,然后增加一点点细节,如下:
<template>
	<view class="left-bubble-container">
		<view class="left">
			<image :src="props.avatarUrl"></image>
		</view>
		<view class="right">
			<view class="bubble">
				<text>{{ props.message }}</text>
			</view>
		</view>
	</view>
</template>
<script setup lang="ts">
import { userDefaultData } from "@/const";

interface propsI {
	message: string;
	avatarUrl: string;
}

const props = withDefaults(defineProps<propsI>(), {
	avatarUrl: userDefaultData.avatarUrl,
});
</script>
<style lang="scss" scoped>
.left-bubble-container {
  margin: 10px 0;
	display: flex;
	.left {
		image {
			height: 50px;
			width: 50px;
			border-radius: 5px;
		}
	}
}
.bubble {
	max-width: calc(100vw - 160px);
	min-height: 25px;
	border-radius: 10px;
	background-color: #ffffff;
	position: relative;
	margin-left: 20px;
	padding: 15px;
	text {
		height: 25px;
		line-height: 25px;
	}
}
.bubble::before {
	position: absolute;
	top: 15px;
	left: -20px;
	content: "";
	width: 0;
	height: 0;
	border-right: 10px solid #ffffff;
	border-bottom: 10px solid transparent;
	border-left: 10px solid transparent;
	border-top: 10px solid transparent;
}
</style>
右气泡模块
右气泡模块我们需要将三角形放在右边,这个好实现。然后这整个气泡我们需要让它处于水平居右,所以这里我使用了:
display: flex;
direction: rtl;
这个属性,但使用的过程中发现气泡中的内容(符号与文字)会出现翻转,“遇事不决,再加一层”,所以我们在内容节点外再套一层:
<span style="direction: ltr; unicode-bidi: bidi-override">
	<text>{{ props.message }}</text>
</span>
然后继续增加一点点细节:
<template>
	<view class="left-bubble-container">
		<view class="right">
			<image :src="props.avatarUrl"></image>
		</view>
		<view class="left">
			<view class="bubble">
				<span style="direction: ltr; unicode-bidi: bidi-override">
					<text>{{ props.message }}</text>
				</span>
			</view>
		</view>
	</view>
</template>
<script setup lang="ts">
import { userDefaultData } from "@/const";

interface propsI {
	message: string;
	avatarUrl: string;
}

const props = withDefaults(defineProps<propsI>(), {
	avatarUrl: userDefaultData.avatarUrl,
});
</script>
<style lang="scss" scoped>
.left-bubble-container {
	display: flex;
	direction: rtl;
	margin: 10px 0;
	.right {
		image {
			height: 50px;
			width: 50px;
			border-radius: 5px;
		}
	}
}
.bubble {
	max-width: calc(100vw - 160px);
	min-height: 25px;
	border-radius: 10px;
	background-color: #ffffff;
	position: relative;
	margin-right: 20px;
	padding: 15px;
	text-align: left;
	text {
		height: 25px;
		line-height: 25px;
	}
}
.bubble::after {
	position: absolute;
	top: 15px;
	right: -20px;
	content: "";
	width: 0;
	height: 0;
	border-right: 10px solid transparent;
	border-bottom: 10px solid transparent;
	border-left: 10px solid #ffffff;
	border-top: 10px solid transparent;
}
</style>
输入模块
没啥说的,需要注意的是:Button记得防抖
<view class="bottom-input">
	<view class="textarea-container">
		<textarea
			auto-height
			fixed="true"
			confirm-type="send"
			v-model="input"
			@confirm="submit"
		/>
	</view>
	<button
		style="
			width: 70px;
			height: 40px;
			line-height: 34px;
			margin: 0 10px;
			background-color: #ffffff;
			border: 3px solid #0256ff;
			color: #0256ff;
		"
		@click="submit"
>
		发送
	</button>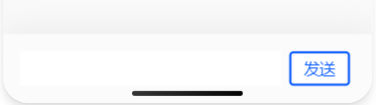
整体
1)考虑如何存储消息
这里仅考虑内存中如何存储,不考虑本地存储,后续思考中会聊到。
export interface messagesI {
  left: boolean;
  text: string;
  time: number;
}如上是消息列表中的一项,为了区分是渲染到左气泡还是右气泡,这里用left来区分了一下;
const messages: Ref<messagesI[]> = ref([]);2)如何推荐消息
这边我封装的服务端接口是这样的:
mutation chat{
  customerChat(talk: "你好啊"){
  	knowledge
    text
    recommend
  }
}recommend是用户可能输入了错误的消息,这里是预测用户的输入字符串,所以我们需要在得到这个字符串后直接显示,然后用户可以一键通过这条消息回复:
function submit(){
	// 略...
	const finalMsg = receive?.knowledge || receive?.text || "你是否想问: " + receive?.recommend;
	// 略...
	if (receive?.recommend) {
		input.value = receive?.recommend;
	} else {
		input.value = "";
	}
}如上,得益于Vue框架,这里实现起来也非常简单,当用户提交之后,如果有推荐的消息,就直接修改input.value从而修改输入框的文字;如果没有就直接清空方便下一次输入。
接下来继续增加一点点细节(chat.vue文件)
<template>
	<view class="chat-container">
		<view class="msg-container">
			<!-- https://github.com/wepyjs/wepy-wechat-demo/issues/7 -->
			<scroll-view scroll-y="true" :scroll-into-view="`msg${messages.length-1}`" :scroll-with-animation="true">
				<view class="msg-list" :id="`msg${index}`" v-for="(msg, index) in messages" :key="msg.time">
					<view class="msg-item">
						<left-bubble v-if="msg.left" :message="msg.text" :avatar-url="meStore.user?.avatarUrl"></left-bubble>
						<right-bubble v-else :message="msg.text" :avatar-url="logoUrl"></right-bubble>
					</view>
				</view>
			</scroll-view>
		</view>
		<view class="bottom-input">
			<view class="textarea-container">
				<textarea
					auto-height
					fixed="true"
					confirm-type="send"
					v-model="input"
					@confirm="submit"
				/>
			</view>
			<button
				style="
					width: 70px;
					height: 40px;
					line-height: 34px;
					margin: 0 10px;
					background-color: #ffffff;
					border: 3px solid #0256ff;
					color: #0256ff;
				"
				@click="submit"
			>
				发送
			</button>
		</view>
	</view>
</template>
<script setup lang="ts">
import { ref, type Ref } from "vue";
import leftBubble from "./leftBubble.vue";
import rightBubble from "./rightBubble.vue";
import type { messagesI } from "./chat.interface";
import { chatGQL } from "@/graphql/me.graphql";
import { useMutation } from "villus";
import { logoUrl } from "@/const";
import { useMeStore } from "@/stores/me.store";

const meStore = useMeStore();

const messages: Ref<messagesI[]> = ref([]);
const input = ref("");

async function submit() {
	if (input.value === "") return;
	messages.value.push({
		left: true,
		text: input.value,
		time: new Date().getTime(),
	});
	const { execute } = useMutation(chatGQL);
	const { error, data } = await execute({ talk: input.value })
	if (error) {
		uni.showToast({
			title: `加载错误`,
			icon: "error",
			duration: 3000,
		});
		throw new Error(`加载错误: ${error}`);
	}
	const receive = data?.customerChat;
	const finalMsg = receive?.knowledge || receive?.text || "你是否想问: " + receive?.recommend;
	messages.value.push({
		left: false,
		text: finalMsg,
		time: new Date().getTime(),
	});
	if (receive?.recommend) {
		input.value = receive?.recommend;
	} else {
		input.value = "";
	}
}

</script>
<style lang="scss" scoped>
.chat-container {
	.msg-container {
		padding: 20px 5px 100px 5px;
		height: calc(100vh - 120px);
		scroll-view {
			height: 100%;
		}
	}
	.bottom-input {
		display: flex;
		align-items: flex-end;
		position: fixed;
		bottom: 0px;
		background-color: #fbfbfb;
		padding: 20px;
		box-shadow: 0px -10px 30px #eeeeee;
		.textarea-container {
			background-color: #ffffff;
			padding: 10px;
			textarea {
				width: calc(100vw - 146px);
				background-color: #ffffff;
			}
		}
	}
}
</style>
思考
如何保存到本地,然后每次加载最新消息,然后向上滚动进行懒加载?
我这里没有实现该功能,毕竟只是一个客服,前端没必要保存消息记录到本地如Localstorage。
这里抛砖引玉,想到了一个最基础的数据结构--链表,用Localstorage-key/value的形式来实现消息队列在本地的多段存储:

当然,有效性有待验证,这里仅仅属于一些想法
最后
然后,我撸了小半天的页面,准备给朋友看看来着,他告诉我微信小程序自带一个客服系统,只需要让button的open-type属性等于contract;